
As a small business startup- the budget will not always be immediately available for you to hire a professional or to purchase the equipment and editing software that you’ll also need for those amazing pictures of your products. When you don’t start off in a brick and motor shop – and many of us don’t, the next closest thing to a shop experience for your customer to get a look and feel of your product is in the images, good quality images are VERY important.
Your images give your potential customers a good idea of what they are purchasing so some general tips to remember are:
Images need to be clear, true to the real thing (so don’t edit the life out of it), and keep your layout simple- your object should not compete with the props you use but compliment. Also, take advantage of natural sunlight and never stand against the light but face it. What you can do for inspiration is to visit some of your favorite brands’ web pages and see what kind of angles and props they use and understand their why.
Now on to the DIY Lightbox method 1 for decent product photography. This method I found via my very resourceful cousin Phuthu who I’d complained to about the inconsistent lighting in my pictures and how I hated that the white in my backdrop was sometimes yellow, always had massive shadows and sometimes the pictures just weren’t crisp.
He sent me a link to an article that gave me a step by step guide on how to create your own lightbox that fixed ALL these issues. I no longer have a link to the article but I did have a backup of the process in pictures that were saved to my hard drive sometime in December.

What you will need:
A box (correct size for you)
Craft Knife
A2 white paper for flooring/Backdrop (or correct size for you)
White Tissue x 3/4 (for cutout sides)
The method is simple enough. Remove the flaps on the opening of your box to make your front. Then 3 sides must be cut out 2.5 in with a craft knife (TOP + RIGHT + LEFT) leaving the bones of the box and the bottom and back intact so that you can attach the tissues to that.
Next, cut your tissue according to the size of your openings and glue to all the bones. Leave the front open.
Lastly, you want to then slide your A2 white paper in and up the bottom to the back of the box and secure it either by glue or sellotape so that it doesn’t slide down. This becomes your mini studio back drop.
To shoot. You will place your box next to a direct source of light but with the opening facing away from the light (too harsh), you want the tissue to be there to diffuse that light and distribute it evenly across the space, as pictured above.

The idea is that light bounces- or reflects. You want less direct, one-sided light as that will cause shadows around the object. The tissue diffuses the light so that it’s not so harsh and the full tissue coverage bounces it back inside which then makes for a more uniform lit background and one that’s easier to edit evenly.

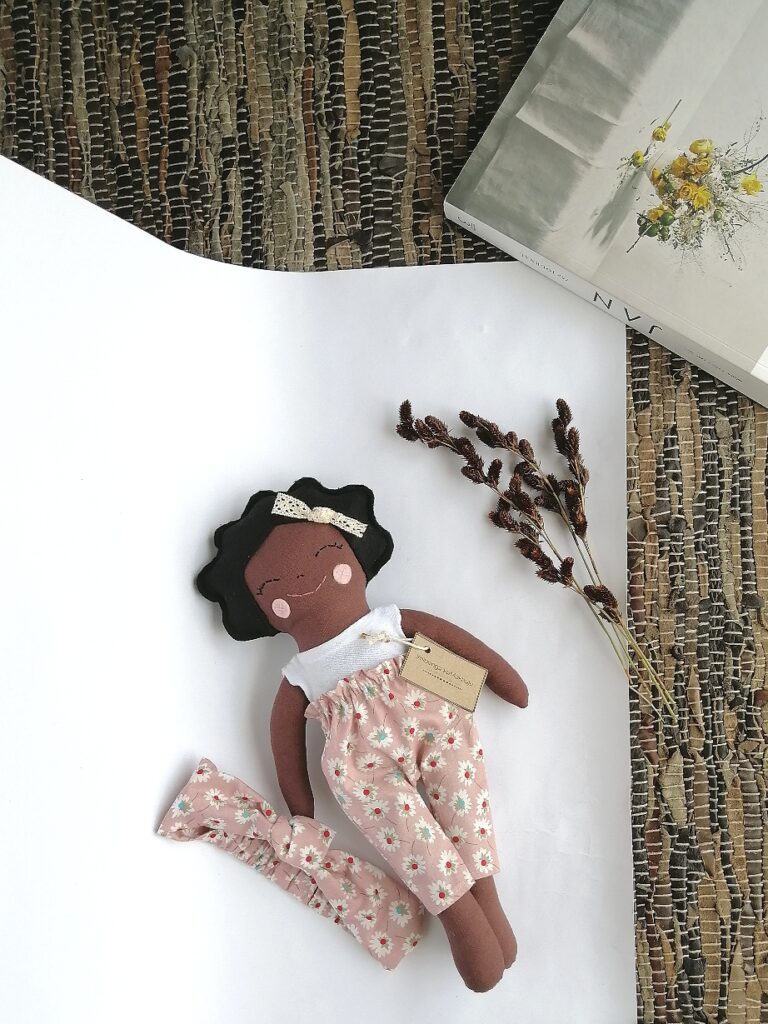
What I currently use is a hack of that, lets call it method 2, where I simply have a white sheet that I roll down on the floor or bed and place the product on top of. I’ll then place another whiteboard on either side opposite to where the most light is coming from- that bounces back some light enough that I don’t have the worst shadows. As you can see I have some shadows because my product is facing direct light but it is what it is for now.

After Edits | Light shadows 
After Edits | Heavy Shadows 
After Edits | Near Perfect Lighting
There are options that you can buy online for lightboxes, places like takealot.com for those who aren’t into DIY. Until then, do what you can with what you have and don’t let not having “things” be the reason you don’t start!